VW Polo 9N 9N3 Cluster Change
2023-08-09
Background
I did this originally because the indicator lights in the old cluster stopped working. Not wanting to risk an MOT failure over something stupid I set about changing the cluster. I decided because they are cheap to try and program a 9N3 cluster instead of go like-for-like with the old one - simply because 9N3 clusters are newer and hopefully will have more life left in them.
If you are going to put a 9N3 cluster in your 9N, make sure the 9N3 cluster has the same warning lights as what yours does (for example, ESP).
These steps were carried out with a standard 9N3 cluster, not an ‘MFD’ one since I didn’t know they existed at the time - otherwise I would have tried it.
Important
Trying to follow this ‘as a guide’ could easily end up in having broken parts and a car that can no longer be used. This is just a documented set of steps that I used to successfully program a 9N3 instrument cluster into a 9N. Certain parts of the document may be useful to others who are happy to take the risk of messing around with the cars instrument cluster/immobiliser.
Hardware
The following hardware was used to do this:
Software
The following software was used to do this:
- VCDS-Lite 1.0 (or above) - MUST be registered!
- VAG Commander 1.4
You may be able to use other software, I did not try them all, however:
- VCDS should work, but I did not have a ‘full’ VCDS cable.
- VAG Tacho 3.01 did NOT work for me with the 9N.
Resources
I originally tried to follow this video to achieve the swap: https://www.youtube.com/watch?v=erNsVXzaeSI. Unfortunately, not all steps worked and/or additional steps were required.
Steps
These are the steps followed to swap the 9N3 cluster into a 9N. The steps are broken down into multiple parts.
Preparation
Before trying any of this some preparation was needed. To swap the clusters over EEPROM had to be read and changed which often ends with bricked things when interrupted.
Car Battery
Getting the clusters swapped took about 4 hours of ignition on time for me. Its important that the car battery is working well and is charged.
It might not take someone else 4 hours depending on what problems they were to run into but I would certainly plan for taking that long.
Laptop
The laptop I used was plugged in the entire time. If that is not an option then the laptop battery must be known to be in good working order with plenty of charge throughout the entire process.
Original Cluster
First some details and EEPROM from the original instrument cluster had to be obtained.
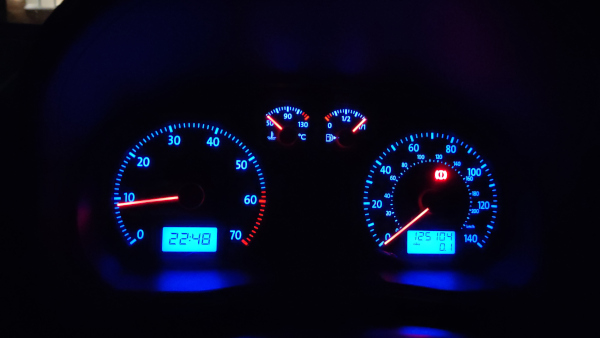
Warning Lights
I took a photo of the warning lights that were displayed on the original instrument cluster immediately after turning on the ignition. This was only to compare with the new one after installation to make sure none were missing.
EEPROM and Values
To get the EEPROM, login value and odometer reading I used VAG Commander.
The VAG KKL cable was connected up to the laptop and OBD port on the car.
- Turn ignition on.
- Open VAG Commander.
- Set Connection Type to
K-line. - Set Target to
07 Kombi. - Click Open Channel.
- Click Instrument / Immobilizer.
- Click Read.
This took a few minutes and for me the window froze. It turns out it was still working and just wanted leaving alone for a bit.
Once complete, values for login and odometer were shown. These values must be valid or further steps won’t work.
- The login value must be 4 digits.
- The odometer reading is in kilometres. See below.
To check the odometer reading I simply converted it to miles and it was within a handful of miles of what the actual odometer was reading. It seems to be normal for it to be slightly different by a few miles, no idea why.
The valid values were then recorded for later:
- The login value will be referred to as the
original cluster login. - The odometer value will be referred to as the
original cluster odometer. - Click Save to save the original EEPROM.
- Close VAG Commander.
- Turn ignition off.
- Wait a few seconds.
Close down VAG Commander and turn off the car ignition. Wait a few seconds.
Troubleshooting
Some notes I have for when things don’t go well getting the original EEPROM and values.
Problem: The values from the read are bad, for example login is 5 digits or the odometer is out by thousands (or millions) of miles.
Try:
- Click Reset ECU and wait until complete.
- Click Read to try reading the EEPROM again.
Coding
The coding values were retrieved with VCDS-Lite.
The VAG KKL cable was still connected up to the laptop and OBD port on the car. The ignition was still off from the last step.
- Turn ignition on.
- Open VCDS-Lite.
- Under Select Control Module click
Select. - Open 19 CAN Gateway.
- The soft coding value from here will be referred to as the
original CAN gateway coding. - Close controller.
- The soft coding value from here will be referred to as the
- Open 17 Instruments.
- The soft coding value from here will be referred to as the
original cluster coding. - Close controller.
- The soft coding value from here will be referred to as the
- Open 25 Immobilizer.
- The soft coding value from here will be referred to as the
original immobiliser coding. - Close controller.
- The soft coding value from here will be referred to as the
- Close down VCDS-Lite.
- Turn ignition off.
Swap Clusters
The original instrument cluster was then removed and the new ones installed.
Its also possible to swap the clear plastic fascia from the original cluster to the new one. The 9N and 9N3 fascias are inter-changeable. This is useful as most eBay instrument clusters arrive badly scratched.
The fascia is removed by carefully releasing each of the big clips around the edge of the instrument cluster.
New Cluster
Before pairing, certain values were needed from the new instrument cluster too.
The steps from EEPROM and Values were repeated with the new instrument cluster, with the following changes:
- The immobiliser light is flashing when ignition is on.
- The login value will be referred to as the
new cluster login. - The odometer value will be referred to as the
new cluster odometer. - Save EEPROM to a different file to make sure not to overwrite the original cluster EEPROM backup.
- After saving the EEPROM but before closing VAG Commander the odometer is corrected:
- Enter the
original cluster odometervalue (in kilometres) into the odometer box. - Click Change.
- Wait until complete.
- Click Reset ECU.
- After a few seconds, the original cluster mileage is now shown on the new instrument cluster.
- Enter the
Immobiliser Pairing
With all the required values to hand after following steps from Original Cluster and New Cluster the immobiliser was then paired.
Confirm Coding
The coding from the new cluster matched the original cluster but it should always still be checked and changed if required.
The VAG KKL cable was still connected up to the laptop and OBD port on the car. The ignition was still off from previous steps.
- Turn ignition on. Do NOT start the engine.
- Open VCDS-Lite.
- Under Select Control Module click
Select. - Open 19 CAN Gateway.
- Open Coding.
- In Software Coding enter the
original CAN gateway coding. - Click Do It!.
- Close controller.
- Open 17 Instruments.
- Open Coding.
- In Software Coding enter the
original cluster coding. - Click Do It!.
- Close controller.
- Open 25 Immobilizer.
- Open Coding.
- In Software Coding enter the
original immobiliser coding. - Click Do It!.
- Close controller.
- Close down VCDS-Lite.
- Turn ignition off.
Clear Fault Codes
To try and prevent potential issues later I cleared the fault codes from any control units involved in the pairing.
The VAG KKL cable was still connected up to the laptop and OBD port on the car. The ignition was still off from the previous step.
- Turn ignition on. Do NOT start the engine.
- Open VCDS-Lite.
- Under Select Control Module click
Select. - Open 01 Engine.
- Click Clear the Fault Codes.
- Close controller.
- Open 17 Instruments.
- Click Clear the Fault Codes.
- Close controller.
- Open 25 Immobilizer.
- Click Clear the Fault Codes.
- Close controller.
VCDS-Lite was kept open and the ignition on for the next steps.
Pairing
After verifying the instrument clusters coding and clearing all the fault codes the actual pairing could now take place. The steps to do this are broken down in the following sections.
NOTE: ALL guides I found suggest this should be carried out under 17 Instruments however after many hours wasted I found I had to do it under 25 Immobilizer. Not sure if this is a 9N3 characteristic or just a VCDS-Lite version dependant thing. I suggest to anyone to try the following sections under 17 Instruments first and if it fails try under 25 Immobilizer.
The VAG KKL cable was still connected up to the laptop and OBD port on the car. The ignition was still on from clearing the fault codes and the VCDS-Lite session still open.
Lockout Timers
Many guides online shown that you must complete the steps under Login first before checking the lockout timers. I found the opposite to be true.
- Open 17 Instruments or 25 Immobilizer (see note in Pairing).
- Open Meas Blocks.
- Enter group
024and click Go.
This returns a list of immobiliser lock-out timers. The values for all items
must be 0.0.
Troubleshooting
Some notes I have for when things don’t go well getting the lockout timers.
Problem: An error in red appears and the measuring bocks cannot be read.
Try:
- Carrying out the under 25 Immobilizer instead of 17 Instruments and vice versa.
- Doing the steps under Login first.
Problem: One or more lockout timers are not 0.0.
Try:
- Leave the ignition on and wait. The value appears to represent minutes, so
8.0will mean you have to leave the ignition on for approximatly 8 minutes. - Read the measuring blocks again until all are at
0.0.
Login
To ’login’ to the cluster I did the following:
- Open Login.
- Enter
0followed by thenew cluster login. If yournew cluster loginis1234enter01234. - Click Do It!.
When login fails VCDS-Lite freezes briefly and a message appears in the top right indicating that the login session is lost. See Troubleshooting.
When login was successful the VCDS-Lite login dialog closed quickly and nothing else happened - like ’no news is good news’.
Troubleshooting
Some notes I have for when things don’t go well logging in.
Problem: VCDS-Lite freezes briefly and a message appears in the top right indicating that the login is reset due to session lost.
Try:
- Carrying out the under 25 Immobilizer instead of 17 Instruments and vice versa.
- Doing the steps under Lockout Timers first.
- Close down VCDS-Lite entirely, ignition off, wait a few minutes, ignition on, start VCDS-Lite and start the Pairing section again.
- Try and retrieve the
new cluster loginagain using New Cluster to make sure you are entering the right code.
Adaptation
After making sure the lockout timers are 0.0 and a successful login the
new cluster was then adapted to the car.
- Open Adaptation.
- In Channel Number enter
50. - Click Read.
See Troubleshooting for suggestions if you have followed these steps and got an error at this point.
After a successful read, adaptation was carried out.
- In New Value enter
0followed by theoriginal cluster login. If youroriginal cluster loginis6789enter06789. - Click Test.
- Click Save.
- The values at the top may change to
32000. This is normal. - Click Done.
- Close down VCDS-Lite.
- Turn off car ignition.
- Wait at LEAST 1 minute.
This completed the pairing of the new cluster to the car. The keys then had to be programmed to the new instrument cluster/immobiliser. See Key Pairing.
Troubleshooting
Some notes I have for when things don’t go well with adaptation.
Problem: VCDS-Lite gives an error when reading the adaptation channel number.
Try:
- Close the Adaption dialog and try again.
- Check your VCDS-Lite is registered.
- Close down VCDS-Lite entirely, ignition off, wait a few minutes, ignition on, start VCDS-Lite and start the Pairing section again. Carefully check for error messages when logging in since they can be subtle.
Key Pairing
Before pairing the keys all keys had to be gathered together since they must all be paired in one go. It is not possible to do some now and some later.
The VAG KKL cable was still connected up to the laptop and OBD port on the car. The ignition was still off from the previous step.
- Turn ignition on. Do NOT start the engine.
- Open VCDS-Lite.
First the steps from Lockout Timers and Login sections under Pairing had to be carried out again.
When opening 17 Instruments or 25 Immobilizer depending on what worked under Pairing a lot of guides online state that the first extra field should now contain your cars VIN number. I found it would flash up with the original VIN and then change to another VIN (presumably from the car the new cluster came from). I chose to ignore this and found no problems what so ever. It could probably be fixed by modifying the new cluster EEPROM but the risk of bricking the new cluster was not worth it.
For errors with login see extra suggestions under Troubleshooting.
After making sure the lockout timers are 0.0 and a successful login the
keys were then paired to the new cluster.
- Open Adaptation.
- In Channel Number enter
21. - Click Read.
See Troubleshooting for suggestions if you have followed these steps and got an error at this point.
After a successful read, any keys paired to the new instrument cluster were wiped out.
- In New Value enter
0. - Click Test.
- Click Save.
After wiping out previously paired keys it was then possible to pair the existing car keys to the new instrument cluster.
WARNING: After completing the next step I then had a total of 60 seconds to complete the rest of the key pairing process. I had to have the entire key pairing process clear in my mind in order to complete it fast enough.- In New Value enter the number of keys you have, for example
2for 2 keys. - Click Test.
- Click Save.
- Click Done.
- Close controller.
- The immobiliser light should now go out.
- Switch ignition off.
- Remove key and place away from ignition barrel.
Then, for each key that needed pairing:
- Insert key into ignition.
- Turn ignition on.
- The immobiliser light should come on for a few seconds and then go out.
- Turn ignition off.
- Remove key and place away from ignition barrel.
This took a few attempts for me and when the process had failed the immobiliser light started to flash rapidly. See Troubleshooting.
Troubleshooting
Some notes I have for when things don’t go well with key pairing.
Problem: cluster login fails.
Try:
- Attempt login with the
new cluster logininstead. If this works adaptation failed and that must be sorted out first. - Steps under Login Troubleshooting.
Problem: VCDS-Lite gives an error when reading the adaptation channel number.
Try:
- Close the Adaption dialog and try again.
- Check your VCDS-Lite is registered.
- Close down VCDS-Lite entirely, ignition off, wait a few minutes, ignition on, start VCDS-Lite and start the Key Pairing section again. Carefully check for error messages when logging in since they can be subtle.
Problem: immobiliser light flashes rapidly during key pairing which indicates pairing failure.
Try:
- Pairing the keys in a different order.
- Ensuring the process is done quickly enough!
- Pairing a single key for now however the process needs to be started from the beginning to pair more keys since keys cannot be simply added.
Finish
Now everything was paired up, the cable was disconnected from the OBD port and it was given a proper test by starting the engine.
I also checked all the warning lights were present by comparing it with a photo of the old cluster.
If you do this, keep a note of the original cluster login because this is the
login value for your car. It might come in very useful in the future!