Controlling Gigabyte Aorus RGB Hidden BIOS Settings
2020-07-01
Introduction
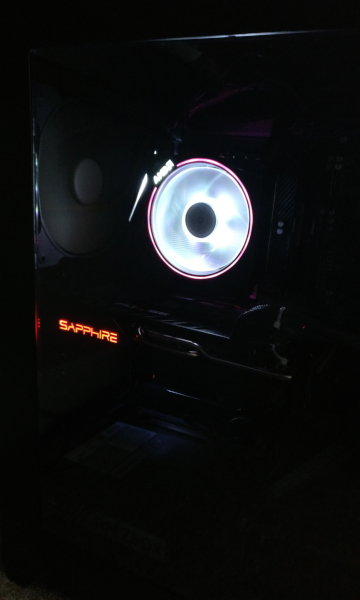
I recently built a computer with a Gigabyte Aorus X570 PRO (non-WIFI) motherboard. One of the things I noticed is that many custom build computers come with lighting - often referred to as RGB.
This board by default has the lighting set to orange. After setting up everything else I decided to see if I could mess around with the RGB and set it more to my own taste.
As this board does not have RGB configuration in the BIOS, the only way to change it would be using Gigabyte’s RGB Fusion software. Unfortunately, this software has attracted a lot of negative reviews, such as here, here, here and here. Additionally, I am a Linux user! So this won’t work for me.
RGB can however, also be controlled by OpenRGB by Adam Honse. OpenRGB supports both Linux and Windows. It seems to work very well for controlling the RGB with this board with two caveats:
- Settings do not persist across reboots.
- Very occasionally, when setting RGB, it causes the computer to hard-freeze.
I was only wanting something simple to permanently set RGB to white to match the case LEDs and to give better visibility of the ports at the back of the computer.
So I decided to mess with the BIOS… (which I have experience with on other systems, so not such a crazy idea).
Well, I am sharing this in-case anyone with the same board has the same issue and wants a permanent fix.
Warnings
IMPORTANT: Since creating this guide, Gigabyte have released new BIOS versions, where the offsets for changing RGB have changed. They seem different for each model (elite, pro, etc) and each BIOS version so there is no point documenting the new offsets. Do NOT follow this guide for newer Aorus BIOS versions!- You should only consider trying this if you are technically competent and this entire guide makes perfect sense to you.
- ONLY try this if you are using a known supported motherboard (see list below). Do NOT under any circumstances be tempted to try this on any other motherboard. You WILL brick it.
- If something goes wrong for you, I take no responsibility what so ever. BIOS modifications are risky and things can easily go wrong if steps are missed or done incorrectly. Even if you follow this guide to the letter and things go wrong for you I take no responsibility.
Known Supported Boards
- Gigabyte Aorus X570 PRO (non-WIFI), BIOS F20b
- Gigabyte Aorus X570 ULTRA, BIOS F20b
Process
Preparation
- Make sure your motherboard is running the BIOS version in the list above. It is impossible for me to say if this will work on later versions as at the time of writing these are the latest versions. If you decide to carry on with a later version this will increase the risk of things going wrong.
- Download this: https://github.com/datasone/grub-mod-setup_var.
It is a modified version of the Grub boot-loader that is capable of reading and
writing hidden EFI BIOS variables. To download, go to the releases section and
take the latest releases
.efibinary. - Rename the downloaded file to
efi-setup-var.efi.
Booting Into The Modified Grub Shell
This can be achieved in two ways. Please pick one method that most suits you.
The Linux Way
- Move the downloaded
efi-setup-var.efifile to the root of your EFI partition. This is a FAT32 file-system that is typically (but NOT always) mounted at/boot. - Run the following command as root, where
--disk /dev/nvme0n1is the disk that holds your EFI partition and--part 1is the partition number of your EFI partition:
# efibootmgr --create --disk /dev/nvme0n1 --part 1 --loader "\efi-setup-var.efi" --label "EFI Setup Var"
- Restart the system and mash F12 for boot menu. Select EFI Setup Var.
The USB Stick Way
- Format a USB stick to FAT32.
- Create a directory on the USB device:
/efi/boot. - Move the
efi-setup-var.efifile to the/efi/bootfolder created on the USB stick. - Rename the
efi-setup-var.efifile to:BOOTX64.efi. - Restart the system and mash F12 to enter the boot menu. Boot from USB.
Checking Existing RGB Settings
If everything went well in the previous steps, you will be at a grub> prompt.
Run the following commands:
grub> setup_var_3 0x2CB
grub> setup_var_3 0x2CC
grub> setup_var_3 0x2CD
grub> setup_var_3 0x2CE
Those commands should be read-only. They will output a lot of other text but you should find the offset values in there somewhere. The offsets should hold the following values:
- 0x2CB 0x3 -> Mode (Static/Solid)
- 0x2CC 0x0 -> Blue Value
- 0x2CD 0x21 -> Green Value
- 0x2CE 0xFF -> Red Value
IF YOU ARE RETURNING DIFFERENT VALUES, DO NOT PROCEED! YOU WILL BE CHANGING RANDOM THINGS! POSSIBLY VOLTAGES, ETC
Changing the RGB Settings
Offset 0x2CB contains the RGB mode, values are:
- 0x0 Off
- 0x1 Pulse
- 0x2 Cycle Colours
- 0x3 Static Colour
- 0x4 Flashing
- 0x5 Double Flashing
- 0x6 Demo Mode
Offset 0x2CC contains the blue value. Range is 0x0 (black) to 0xFF (blue).
Offset 0x2CD contains the green value. Range is 0x0 (black) to 0xFF (green).
Offset 0x2CE contains the red value. Range is 0x0 (black) to 0xFF (red).
So for example, to change the RGB to show a constant static white light, run:
grub> setup_var_3 0x2CB 0x3
grub> setup_var_3 0x2CC 0xFF
grub> setup_var_3 0x2CD 0xFF
grub> setup_var_3 0x2CE 0xFF
When finished, run:
grub> reboot
Final Notes
These settings are hidden BIOS settings, so they will persist until CMOS is reset.